Home
- POV-Ray Tutorial
- POV-Ray Examples
Index of Content
- Geometry
- Architecture
- House
- Roof
- Tower
- Castle
- Window + Door
- Stairs
- Stairs
- Winding Stairs
- Pyramid
- Columns
- Arch
- Fences
- Furnitur
- Household
- Engineering
|
|
Stair
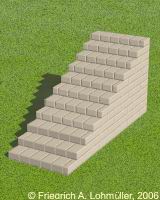
This How To shows the construction of a simple stair as a
massive structure.
For this we first define the outer dimensions:
Length, height and width of the stair.
Then we decide how big the approximate height of the steps should be.
Then the number and the dimensions of the steps are calculated automatically.
A special problem is the wall texture with bricks and mortar:
the pattern must be adapted by transformations to the step height, step width and step deepth.
An include file to use this object as a read-made object you can find
at my POV-Ray Objects page.
|
How To Do:
First we declare the texture and the outer dimensions of the wall:
#declare Step_Texture =
 texture{
   pigment{ color rgb<0.9,0.8,0.6>}
   finish { diffuse 0.9 phong 0.1}
        } // end of texture
//----------------------------------
// height of the stair (Y),
#declare Stair_Y = 2.00;
// length of the stair (X)
#declare Stair_X = 4.00;
// stair width (Z)
#declare Step_Z  = 1.50;
Then we define the approximate height of the steps:
#declare Step_Height = 0.175;
From this we calculate the number of steps and the real
dimensions of the steps:
// total number of steps
#local N_o_Steps =
     int(Stair_Y/Step_Height);
// real step height caculating:
#local Step_H = Stair_Y/N_o_Steps;
// -------------------------------------
// deepth of one step in x direction:
#local Step_X = Stair_X / N_o_Steps;
// -------------------------------------
With these values we can buildt up a stair in
a while loop:
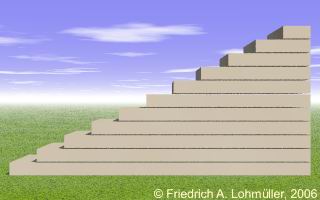
(here with intentionally clearly seperated elements!)
|
| Stair - basic shape
|
union{
 #local Nr = 0;   // start steps
 #while (Nr <  N_o_Steps)

  box { <Nr*Step_X, 0, 0>,<Stair_X, Step_H-0.01, Step_Z>
        translate<0,Nr*Step_H,0>
      }

 #local Nr = Nr+1;
 #end //------------ end of while loop
 // end of steps
 texture{Step_Texture}
 //----------------------------------//
 translate<-2.00,0.00, 0.00>
} // end of union
|
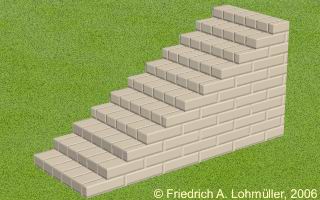
Realistic Wall Texture
With the POV-Ray pattern type "bricks" used as a "texture normal"
it's possible to simulate bricks with mortar in a relativly simple way:
#declare Brick_Scale     = <0.09,0.061,0.061>;
#declare Brick_Translate = <0.0, 0.025,-0.0>;
#declare Brick_Intensity = 0.10;
//--------------------------------------
#declare Step_Texture =  // sandstone
  texture{ pigment{ color rgb< 0.90, 0.78, 0.60>}
           normal { pigment_pattern{
                         brick
                         color rgb 0.1,
                         color rgb 0.9
                         scale Brick_Scale
                         translate Brick_Translate
                         rotate<0,0,0>}
                    Brick_Intensity
                  } // end of normal
                    finish { diffuse 0.9 phong 0.1}
         } // end of texture
//----------------------------------------------------
| Wall with interstices.
|
The Adaption of the height and width of the pattern to
the dimensions of the wall is a difficult thing. For problems with
the "bricks" pattern see my comments in the turorial
Tower with Battlements.
|
Ready-made POV-Ray objects as
include files and example files you'll find
at the POV-Ray Objects Page
|


