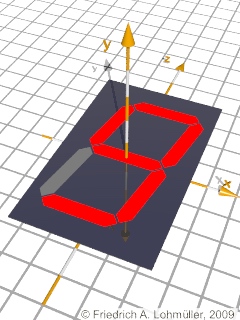
Passo 3: Seven_Segment_LED macro:
Il macro seguente usa il macro precedente "SS7_Element(...)"!
//--------------------------------------------
#macro Seven_Segment( SS_Number,
                      SS_Angle,
                      SS_Background_Scale,
                      SS_Light_Color,
                      SS_Shade_Color,
                      SS_Background_Color,
                    ) //----------------------
//--------------------------------------------
#local SS_Len = 6.2;
#local D = 0.0001;  // just a little bit !!
#local Shear_Factor =  tan(radians(SS_Angle));
//--------------------------------------------
// La sequenza degli elementi:
//      -       1
//    /  /   6    2
//     -        7
//  /  /     5    3
//   -          4
//--------------------------------------------
#switch (SS_Number)
#case(0)
 #local Lights_On = array [7] {1,1,1,1,1,1,0}
#break
#case(1)
 #local Lights_On = array [7] {0,1,1,0,0,0,0}
#break
#case(2)
 #local Lights_On = array [7] {1,1,0,1,1,0,1}
#break
#case(3)
 #local Lights_On = array [7] {1,1,1,1,0,0,1}
#break
#case(4)
 #local Lights_On = array [7] {0,1,1,0,0,1,1}
#break
#case(5)
 #local Lights_On = array [7] {1,0,1,1,0,1,1}
#break
#case(6)
 #local Lights_On = array [7] {1,0,1,1,1,1,1}
#break
#case(7)
 #local Lights_On = array [7] {1,1,1,0,0,0,0}
#break
#case(8)
 #local Lights_On = array [7] {1,1,1,1,1,1,1}
#break
#case(9)
 #local Lights_On = array [7] {1,1,1,1,0,1,1}
#break
#else // nothing - all off!!!
 #local Lights_On = array [7] {0,0,0,0,0,0,0}
#break
#end //  end of switch for arrays
//---------------------------------------
#macro Light_Color(Num)
#if(Lights_On[Num] = 1)  SS_Light_Color
#else                    SS_Shade_Color
#end
#end //--------------------- end of macro
union{

 union{
 object{ S7_Element( Light_Color(1-1))

         translate<0,0, SS_Len> }
 object{ S7_Element( Light_Color(7-1))
         translate<0,0, 0> }
 object{ S7_Element( Light_Color(4-1))
         translate<0,0,-SS_Len> }

 object{ S7_Element( Light_Color(2-1))
         rotate<0,90,0>
         translate< SS_Len/2,0, SS_Len/2>}
 object{ S7_Element( Light_Color(3-1))
         rotate<0,90,0>
         translate< SS_Len/2,0,-SS_Len/2>}
 object{ S7_Element( Light_Color(6-1))
         rotate<0,90,0>
         translate<-SS_Len/2,0, SS_Len/2>}
 object{ S7_Element( Light_Color(5-1))
         rotate<0,90,0>
         translate<-SS_Len/2,0,-SS_Len/2>}
 //*)
 } // end LEDs
box{ <-SS_Len/2,-0.01     ,-SS_Len>,
     < SS_Len/2,-0.0000001, SS_Len>
     scale SS_Background_Scale
     texture {SS_Background_Color}}
translate<0,D,0>
} // end of union
#end //---------------------- end of macro
//----------------------------------------

#declare Active_Texture =  // red
  texture{
    pigment{ color rgb< 1,0,0>*1.2}
    finish { ambient .9 diffuse .1 phong 1}
  } // end of texture
#declare Inactive_Texture =  // gray
  texture{
    pigment{ color rgb<1,1,1>*0.3}
    finish { phong 1 reflection 0.00}
  } // end of texture
#declare Background_Texture =  // ~black
  texture{
    pigment{ color rgb<1,1,1>*0.05}
    finish { phong 1 reflection 0.10}
  } // end of texture


//----------------------------------------
//----------------------------------------
object{
  Seven_Segment(
    9, // 0~9, integer !!! SS_Number,
    0, // 0~10, SS_Angle for shearing,
    < 1.5, 10, 1.40>, // SS_Background_Scale,
    // < 1.70, 10, 1.40>, //for SS_Angle=10
    Active_Texture, // SS_Light_Color,
    Inactive_Texture, //SS_Shade_Color,
    Background_Texture, //SS_Background_Color,
  ) //------------------------------------
    scale 0.1
    rotate< 0,0,0>
    translate<0,0.05,0> }
//----------------------------------------
|
Display a cristalli liquidi a sette segmenti
Passo Addizionale:
Scorrimento elastico dei sette segmenti
Per questo dobbiamo inserire nel macro alla marca "//*)"
una matrice di scorrimento elastico:
 matrix< 1,  0,  0, // matrix-shear_z_to_x
         0,  1,  0,
     Shear_Factor, 0,  1,
         0,  0,  0 >
ma poi dobbiamo adattare la scala del fondo con
< 1.70, 10, 1.40>
Scorrimento elastico dei sette segmenti
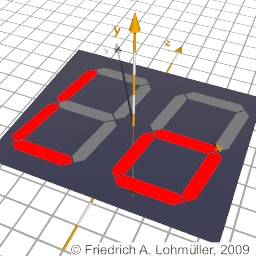
Adesso siamo sicuro in grado di fare un LCD che posso anche presentare altri simboli non-numerici molto importanti:
Un 7 segment LCD tipo Lo. :-)
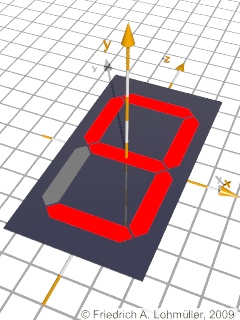
Descizione della scena per
un singolo display a cristalli liquidi
a sette segmenti
per POV-Ray:
"Seven_Segment_9.txt" o
"Seven_Segment_9.pov"
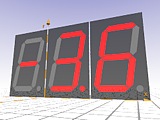
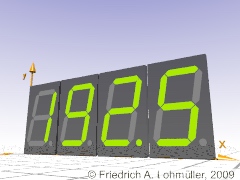
Allora, tocca a lei fare un display con più di cifre e con una apparenza più perfetta come questo:
Un display a sette segmenti LCD
con 4 cifre e punti.
|
