Descriptions and Examples for the POV-Ray Raytracer by Friedrich A. Lohmüller
    POV-Ray Examples - How To Make Objects for POV-Ray
Italiano Italiano
Français français
Deutsch Deutsch

Home
- POV-Ray Tutorial
  - POV-Ray Examples
   Index of Content
  - Geometry
  - Architecture
  - Engineering
    - Ladder
    - Pylons
    - Railing
    - Bridge
    - Tubes
    - Tube Fork
    - Tube Stopcock
    - Chain
    - Coil of Wire
    - Torpedo
    - Cruise Missile
    - Rocket
    - Wheel
    - Truck
    - Propeller
    - Airplanes
    - Canoe
    - Guitar Body
    - 7-Segment Display
    - Ribbon Cable
    - Cable Harness
                                       
 
7-Segment_LCD

 
7-Segment Display (LCD - liquid crystal display)

Objects: box, polygon.
Methods: #declare, #local, union, #macro, #while, #if #else, #switch, array.

How to Make a 7-Segment Display (LCD):
 

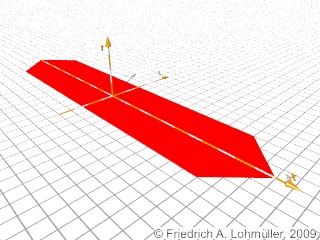
Step 1: A Single 7-Segment Element:

First we buildt a single LCD element by using
polygon with closed serie of border points:
// polygon { number of points,
//                  list of <x,y> points - closed serie! }
#local SS_Width = 1.2;
#local SS_Length = 6.0;
#local SS_Diag = sqrt(SS_Width*SS_Width)/2;

#declare Seven_Segment_Element = //---------
polygon {  7,
  <-SS_Length/2, 0>,
  <-SS_Length/2+SS_Diag, -SS_Width/2>,
  < SS_Length/2-SS_Diag, -SS_Width/2>,
  < SS_Length/2, 0>,
  < SS_Length/2-SS_Diag,  SS_Width/2>,
  <-SS_Length/2+SS_Diag,  SS_Width/2>,
  <-SS_Length/2, 0>
  texture{
    pigment{ color rgb< 1, 0, 0> }
    finish { ambient 0.9 diffuse 0.1 phong 1}
         } // end of texture
  rotate<90,0,0>//turn it on the floor !!
} // end of polygon --------------------------
Seven_Segment_Element

Step 2: The 7-Segment Element as a Macro

To be able to change the color from active to inactive we have to convert the definition to a macro definition:

#macro SS7_Element( SS_Color__ )
#local SS_Width = 1.2;
#local SS_Length = 6.0;
#local SS_Diag = sqrt(SS_Width*SS_Width)/2;

polygon {  7,
  <-SS_Length/2, 0>,
  <-SS_Length/2+SS_Diag, -SS_Width/2>,
  < SS_Length/2-SS_Diag, -SS_Width/2>,
  < SS_Length/2, 0>,
  < SS_Length/2-SS_Diag,  SS_Width/2>,
  <-SS_Length/2+SS_Diag,  SS_Width/2>,
  <-SS_Length/2, 0>
  texture{SS_Color__}
  rotate<90,0,0>//turn it on the floor !!
} // end of polygon --------------------------

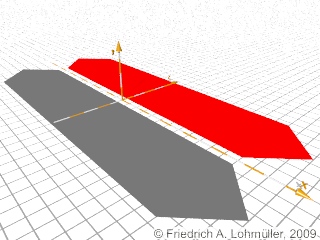
We can call this macro with any color we want:

#declare Active =   // red
  texture{
     pigment{ color rgb< 1, 0, 0>}
     finish { ambient 0.9 diffuse 0.1}
  } // end of texture
#declare Inactive =   //gray
  texture{
     pigment{ color rgb<1,1,1>*0.2}
  } // end of texture

object{
  S7_Element( Active )
  translate<0,0.001, 0.7>}
object{
  S7_Element(Inactive)
  translate<0,0.001,-0.7>}
Seven_Segment_Element
7-Segment LCD elements

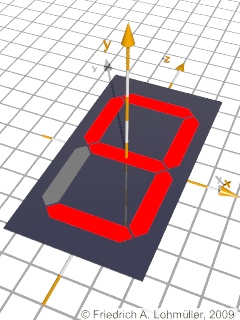
Step 3: Seven_Segment_LED macro:

The following macro uses the previous macro "SS7_Element(...)"!
//--------------------------------------------
#macro Seven_Segment( SS_Number,
                      SS_Angle,
                      SS_Background_Scale,
                      SS_Light_Color,
                      SS_Shade_Color,
                      SS_Background_Color,
                    ) //----------------------
//--------------------------------------------
#local SS_Len = 6.2;
#local D = 0.0001;  // just a little bit !!
#local Shear_Factor =  tan(radians(SS_Angle));
//---------------------------------------------
// The sequence of the elements:
//      -       1
//    /  /   6    2
//     -        7
//  /  /     5    3
//   -          4
//---------------------------------------------
#switch (SS_Number)
#case(0)
 #local Lights_On = array [7] {1,1,1,1,1,1,0}
#break
#case(1)
 #local Lights_On = array [7] {0,1,1,0,0,0,0}
#break
#case(2)
 #local Lights_On = array [7] {1,1,0,1,1,0,1}
#break
#case(3)
 #local Lights_On = array [7] {1,1,1,1,0,0,1}
#break
#case(4)
 #local Lights_On = array [7] {0,1,1,0,0,1,1}
#break
#case(5)
 #local Lights_On = array [7] {1,0,1,1,0,1,1}
#break
#case(6)
 #local Lights_On = array [7] {1,0,1,1,1,1,1}
#break
#case(7)
 #local Lights_On = array [7] {1,1,1,0,0,0,0}
#break
#case(8)
 #local Lights_On = array [7] {1,1,1,1,1,1,1}
#break
#case(9)
 #local Lights_On = array [7] {1,1,1,1,0,1,1}
#break
#else // nothing - all off!!!
 #local Lights_On = array [7] {0,0,0,0,0,0,0}
#break
#end //  end of switch for arrays
//---------------------------------------
#macro Light_Color(Num)
#if(Lights_On[Num] = 1)  SS_Light_Color
#else                    SS_Shade_Color
#end
#end //--------------------- end of macro
union{

 union{
 object{ S7_Element( Light_Color(1-1)) 
translate<0,0, SS_Len> } object{ S7_Element( Light_Color(7-1)) translate<0,0, 0> } object{ S7_Element( Light_Color(4-1)) translate<0,0,-SS_Len> } object{ S7_Element( Light_Color(2-1)) rotate<0,90,0> translate< SS_Len/2,0, SS_Len/2>} object{ S7_Element( Light_Color(3-1)) rotate<0,90,0> translate< SS_Len/2,0,-SS_Len/2>} object{ S7_Element( Light_Color(6-1)) rotate<0,90,0> translate<-SS_Len/2,0, SS_Len/2>} object{ S7_Element( Light_Color(5-1)) rotate<0,90,0> translate<-SS_Len/2,0,-SS_Len/2>} //*) } // end LEDs box{ <-SS_Len/2,-0.01 ,-SS_Len>, < SS_Len/2,-0.0000001, SS_Len> scale SS_Background_Scale texture {SS_Background_Color}} translate<0,D,0> } // end of union #end //---------------------- end of macro //---------------------------------------- #declare Active_Texture = // red texture{ pigment{ color rgb< 1,0,0>*1.2} finish { ambient .9 diffuse .1 phong 1} } // end of texture #declare Inactive_Texture = // gray texture{ pigment{ color rgb<1,1,1>*0.3} finish { phong 1 reflection 0.00} } // end of texture #declare Background_Texture = // ~black texture{ pigment{ color rgb<1,1,1>*0.05} finish { phong 1 reflection 0.10} } // end of texture
Seven_Segment_LCD
7-Segment LCD

Additional Step:
      Sheared Seven_Segments

If we add to our macro at the mark "//*)"
the sheering matrix

 matrix< 1,  0,  0, // matrix-shear_z_to_x
         0,  1,  0,
     Shear_Factor, 0,  1,
         0,  0,  0 >
we have to addapt the background panel by scaling it with
< 1.70, 10, 1.40>
Seven_Segment_LCD
A sheared 7-Segment LCD.
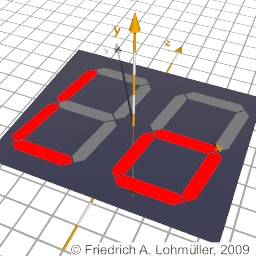
Sure you can enable your LCD to present also some non numerical important signs:
Seven_Segment_LCD
A Lo-7-Segment LCD. :-)


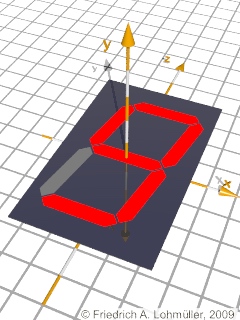
Scene file for
a single 7-Segment LCD
in POV-Ray:
"Seven_Segment_9.txt" or
"Seven_Segment_9.pov"


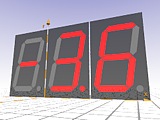
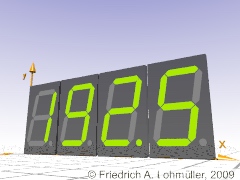
Well, now it's up to you to make it with more digits and more perfect like this:
Seven_Segment_LCD
A 7-segment LCD with 4 digits and points.
Ready-made POV-Ray objects as
include files and example files you'll find
at the POV-Ray Objects Page
top
© Friedrich A. Lohmüller, 2009
www.f-lohmueller.de