Page d'Accueil
- POV-Ray Tutorial
- Exemples POV-Ray
Table des matières
- Architecture
- Geometrie
- Technique
- Échelle
- Pylônes
- Garde-fou, Rambarde
- Pont
- Tuyaux
- Bifurcation de Tuyau
- Robinet d'Arrêt
- Chaîne
- Bobine de fil
- Torpedo
- Cruise Missile
- Missile
- Roue
- Camion
- Hélice
- Avion
- Canoë
- Guitare
- Afficheur 7 segments
- Câble plat - Nappe plat
- Harnais de câbles
|
|
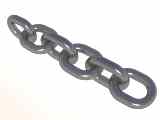
Maillons d'une Chaîne
et une Chaîne
Objets : sphere, box, cylinder.
Méthodes : #declare, union, difference, #while, #if.
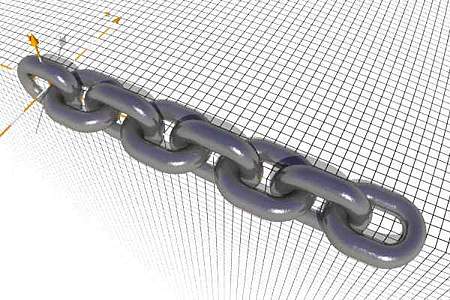
Cet exemple fait voir comment on peut construire une chaîne.
Il est possible utiliser des dimensions variables pour les maillons de la chaîne. |
|
|
La Construction en detail :
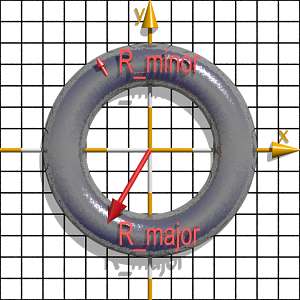
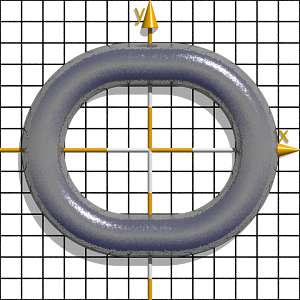
Pas 0 : Déclaration les dimensions de base d'un tore utilisé pour le maillon :
#declare R_min = 0.25;
#declare R_maj = 1.00;
#declare Half_L = 0.25;
 // = la moitié de la section droite !
#declare Link_Length = 2*(R_maj); |
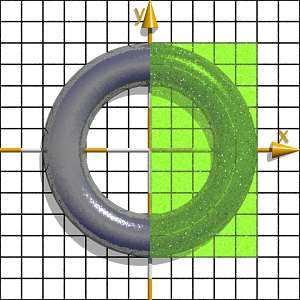
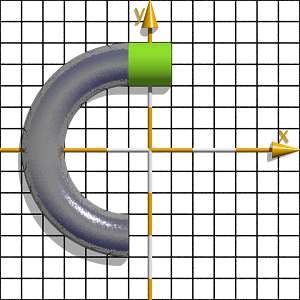
Pas 1 : Définition d'une box que contient la moitié à droite du tore
et soustraction ce box de la forme du tore :
difference{
 torus { R_maj, R_min
         rotate <90,0,0>
       } // end of torus  --------------
 box{<           0,-R_maj-R_min,-R_min>,
     < R_maj+R_min, R_maj+R_min, R_min>
    }// end of box
}// end of difference |
|
|
|
|
|
|
|
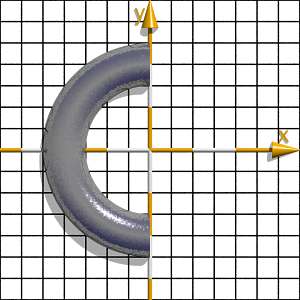
Pas 2: Nous devons mouvoir le semitore à gauche par
la moité du longeur de la section droite du maillon de la chaîne.
Puis on doit ajouter une (seulement une!) partie droite (un cylindre) au maillon.
Après cela nous déclarons ces deux parties comme un objet nouveau
"Left_Half" et puis faissions une réflexion de cet élément
au point <0,0,0> par "scale<-1,-1,1>" :
#declare Left_Half =
union{
difference{
 torus { R_maj, R_min
         rotate <90,0,0>
       } // end of torus  -------------
 box{<          0,-R_maj-R_min,-R_min>,
     <R_maj+R_min, R_maj+R_min, R_min>
    }// end of box

 translate <-Half_L,0,0>
 }// end of difference

 cylinder {
    <-Half_L,0,0>,<Half_L,0,0>, R_min
    translate <0,R_maj,0>
  } // end of cylinder
}// end of union
//-------------------------------------
#declare Chain_Link =
union{
object{ Left_Half }
object{ Left_Half scale <-1,-1,1>}

texture{
   pigment{color rgb<1,1,1>*0.2}
   normal {bumps 0.125 scale 0.015}
   finish {phong 0.5 reflection 0.2}
       } // end of texture
} // end of Chain_Element |
|
|
|
|
|
|
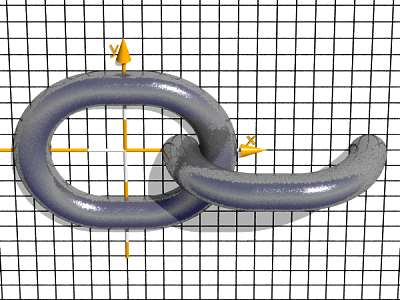
Pas 3: Pour la construction d'une chaîne
nous avons besoin de mouvoir les maillons par une distance
déclarée avec "Link_Length"
et nous devons tourner chaque second maillon par 90 degré autour de axe x.
Tout cela nous pouvons faire avec une méthode très économique avec un boucle "while" :
|
|
union{
 #declare Nr = 0;    // start
 #declare EndNr = 6; // end
 #while (Nr< EndNr)
   object{ Chain_Link
           #if ( int(Nr/2) ! = Nr/2 )
                rotate <90,0,0>
           #end
           translate <Nr*Link_Length,0,0>
         }
 #declare Nr = Nr + 1;  // next Nr
 #end // ----------------- end of loop
} // end of union |
|
La description de la scène pour POV-Ray :
"chain.txt" ou
"chain.pov"
|
|
