Home
- POV-Ray Tutorial
Model Railroading
Railway Modelling
with POV-Ray
Index of Content
- Rail Track System
for POV-Ray
Basic Track Elements
- Straight & Curved
- Switches
- Wye + 3Ways
- Level Junctions
- Simplified Using by
RT_System_00.inc
- Rail Tracks Elements
with RT_System_00.inc
- Track Layout with
Model Scaled Tracks
- H0 Scale Tracks
- N Scale Tracks
- Z Scale Tracks
- Track Layout with
scaled Tracks
> Track Placement
- Tracks Up & Down
- Track Layout Examples
- Simple cyclic
- Simple eight
- Download of the
Rail Track System
|
|
|
Track Layout Technics with scaled Tracks
Basic Track Placement
|
The Placement of Track Elements
Demonstration with N scale tracksystem of geometry type A:
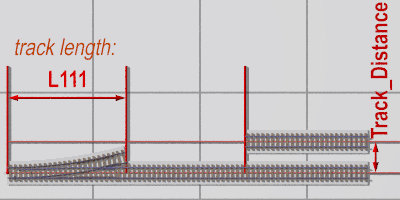
1) Straights, turnouts / switches
and level junctions / diamond crossings.
//-------------------------------------------//
object{SW_L(0)translate<0*L111,0,0> }
object{ T_111 translate<1*L111,0,0> }
object{ T_111 translate<2*L111,0,0> }
object{ T_111
        translate<2*L111,0,1*Track_Distance>}
//-------------------------------------------// |
|
.....
|
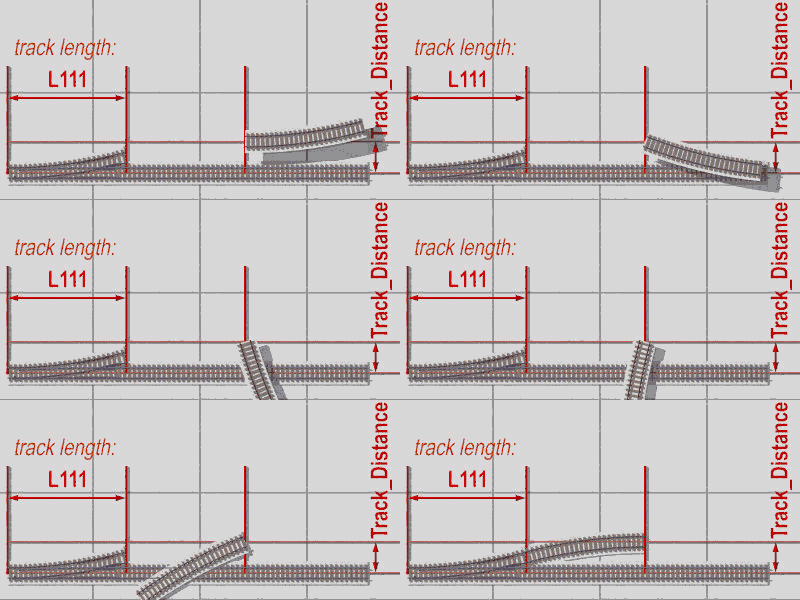
2) Curves for turnouts / switches.
Turnouts / switches here have an angle of 15°
and a curve radius of R9 (~0.42887*N)
1st method:
Rotate a left curve track around 180° and move it to the end point.
//-------------------------------------------//
object{ T_L9_15
        rotate<0,180,0>
        translate<2*L111,0,1*Track_Distance>}
//-------------------------------------------// |
Note: Because of preview with track names we should avoid any mirroring of curves, switches etc., otherwise we will see
with mode 'Simulate_On = 3' only mirrored textes!!!
This means don't use 'scale<-1,1,1> or 'scale<1,1,-1>
|
A left curve track rotated by 180°
|
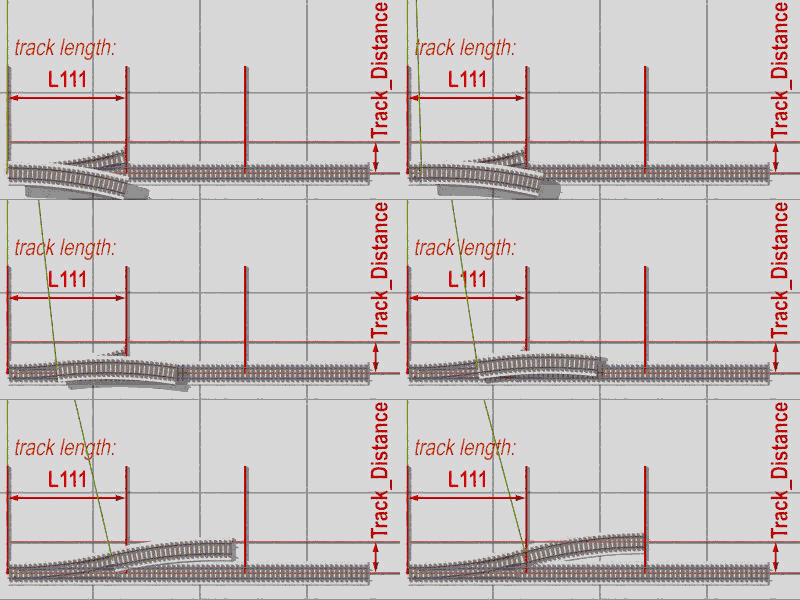
2nd method:
Using Rotate_Around_Trans macro needs:
'#include "transforms.inc"'
//-------------------------------------------//
#include "transforms.inc"
object{ T_R9_15
        Rotate_Around_Trans(<0,-15,0>,<0,0,R9>)
        translate<0*L111 ,0,0*Track_Distance>
      }
//-------------------------------------------// |
Note: This method is often very important for correctly adding tracks behind curves and switches.!!! |
Using 'Rotate_Around_Trans( ... )' macro
|
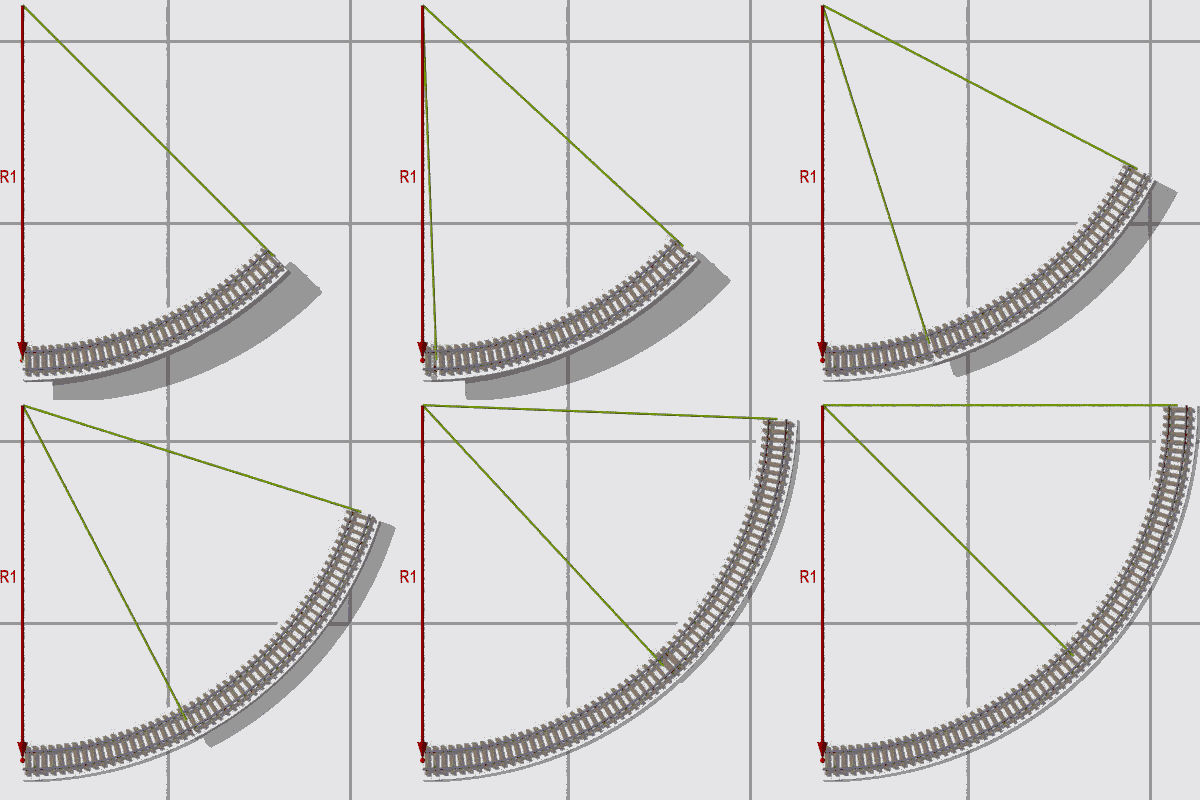
3) Adding Curves.
Method:
Rotate the left curve tracks of 45° around the point <0,0,R1>.
//-------------------------------------------//
object{ T_L1_45 }
object{ T_L1_15
        Rotate_Around_Trans(<0,-45,0>,<0,0,R1>)
      }
object{ T_L1_15
        Rotate_Around_Trans(<1,-45,0>,<0,0,R1>)
      }
//-------------------------------------------// |
For curved tracks we often need to turn tracks by an angle around a center of rotation
by using the macro 'Rotate_Around_Trans( RotationVector, Center_of_Rotation )' from the
include file 'transforms.inc'.
We can replace the long command
'Rotate_Around_Trans(<0, 1*15,0>,<0,0,-R1>)'
by a shorter expression like
'RTyz( 1*15, -R1 )'
by declaring the following macro:
#include "transforms.inc"
#macro RTyz( Y_Angle, Z_Distance )
 Rotate_Around_Trans
      (<0, Y_Angle,0>,<0,0, Z_Distance>)
#end |
With this the above text is much shorter:
//-------------------------------------------//
object{ T_L1_45 }
object{ T_L9_15 RTyz(-0*45, R1) }
object{ T_L9_15 RTyz(-1*45, R1) }
//-------------------------------------------// |
|
A left curve track rotated by -45° (couterclockwise!)
|
|


