Home
- POV-Ray Tutorial
Model Railroading
Railway Modelling
with POV-Ray
Index of Content
- Rail Track System
for POV-Ray
Basic Track Elements
- Straight & Curved
- Switches
- Wye + 3Ways
- Level Junctions
- Simplified Using by
RT_System_00.inc
- Rail Tracks Elements
with RT_System_00.inc
> Track Layout with
Model scaled Tracks
- H0 Scale Tracks
- N Scale Tracks
- Z Scale Tracks
- Track Layout with
scaled Tracks
- Track Placement
- Tracks Up & Down
- Track Layout Examples
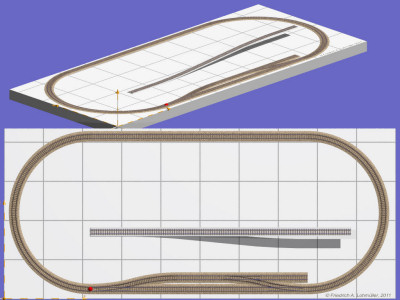
- Simple cyclic
- Simple eight
- Download of the
Rail Track System
|
|
|
Track Layout for Tracks of Model Gauges.
Adapted elements of the Rail Track System
for railroad / railway track models
in gauge H0, N, Z, ....
|
With some additional include file we can design track layouts like with ready made sets of tracks
for model railroading / railway modelling in a very comfortable and easy way.
All elements (H0, N, Z scales tracks) are scaled up to the scale: 1 unit = 1 m (meter)
for the use together with other POV-Ray models.
Available also here: the different preview types from my 'Rail Track System for POV-Ray'.
Needed files, Interdependences:
| directory |
file name |
content |
| |
shapes_lo.inc |
Needed by the following files! |
| RT_System/ |
RT_System_Sizes_00.inc |
Basic Track Dimensions
|
| |
RT_Track_Straight_00.inc
RT_Track_Curve_00.inc
RT_Track_Level_Junction_00.inc
RT_Track_Switch_A_00.inc
RT_Track_Switch_B_00.inc
RT_Track_Switch_3Ways_A_00.inc
RT_Track_Switch_3Ways_B_00.inc
RT_Track_Switch_Y_00.inc
|
The Basic Track Elements:
staight track,
curved track,
level junction / diamond crossing,
turnouts / switches / points r/l type A,
turnouts / switches / points r/l type B,
three way turnout / switch / point type A,
three way turnout / switch / point type B,
wye turnout / switch / point.
Note: All elements require 'RT_System_Sizes_00.inc' |
| |
RT_System_00.inc |
Track with different simulation modes.
|
| |
H0_TypeB/ |
RT_H0_TypeB_Set_00.inc
RT_H0_TypeB_Track_Up_00.inc |
Trackset of typical H0 gauge rail track layout type B
Macro for tracks up and down. |
| |
N_TypeA111/ |
RT_N_TypeA111_Set_00.inc
RT_N_TypeA111_Track_Up_00.inc |
Trackset of typical N gauge rail track layout type A
Macro for tracks up and down. |
| |
Z_TypeA110/ |
Z_TypeA110_Set_00.inc
Z_TypeA110_Track_Up_00.inc |
Trackset of typical Z gauge rail track layout type A
Macro for tracks up and down. |
Note: My tracksets are normaly containing many additional track elements regarding to
the tracksets of most manufacturers
- I don't make here tracksets for a special manufacturer -
If we want to create track layouts for the track sets of a specific manufacturer, we have to check, which of these elements
are really available by this manufacturer.
I.e.: normally my trackset are containing curves with the radii R1, R2, R3, ...., R10. Many manufacturers
do only produce curves with the radii R1, R2, R3, R4 and R9. It does not make sense to restict this
include file to only these radii. Most of the model track manufacturers produce also flexible rail tracks,
which allow nearly every radius we need.
Activation: We have to add: (Sample for N Gauge Set)
#declare Simulate_On = 3 ; //  simulation mode
#include "RT_System/N_TypeA111/RT_N_TypeA111_Set_00.inc"
#include "RT_System/N_TypeA111/RT_N_TypeA111_Track_Up_00.inc"
//---------------------------------------------------------//
|
The other necessary file from above were included automatically!
|
|
Then we can call the elements very shortly, i.e. like this:
 object{ SW_L( SD_1)               translate< 0*L111,0,0> }
 object{ T_R9_15 RTyz( -1*15, R9)  translate< 0*L111,0,0> }

 object{ T_111       translate< 2*L111,0, 1*Track_Distance> }
 object{ SW_R( SD_1) translate< 3*L111,0, 1*Track_Distance> }
 object{ T_111       translate< 4*L111,0, 1*Track_Distance> }

 object{ T_111       translate< 1*L111,0,0> }
 object{ T_111       translate< 2*L111,0,0> }
 object{ T_111       translate< 3*L111,0,0> }
 object{ SW_R( SD_1) rotate<0,180,0> translate< 5*L111,0,0> }

//-----------------------------------------------------------// |
|
We can use different simulation modes
from symbolic blocks with text
to real rail tracks on gravel balast.
Symbolic blocks with text
Real rail tracks on gravel balast
|
Also tracks going up and down are easy to make:
(The middle line up in the above image)
#local Step_1 = 0.010;
 object{ T_111                              translate< 0*L111, 0.0*Step_1*N,0> }
 object{ Track_Up_00("T_111", Step_1/2, 1)  translate< 1*L111, 0.0*Step_1*N,0> }
 object{ Track_Up_00("T_111", Step_1  , 0)  translate< 2*L111, 0.5*Step_1*N,0> }
 object{ Track_Up_00("T_111", Step_1  , 0)  translate< 3*L111, 1.5*Step_1*N,0> }
 object{ Track_Up_00("T_111", Step_1/2, 2)  translate< 4*L111, 2.5*Step_1*N,0> }
 object{ T_111                              translate< 5*L111, 3.0*Step_1*N,0> }
//------------------------------------------------------------------------------// |
|
|


