Home
- POV-Ray Tutorial
LEGO® and POV-Ray
Content
CAD for LEGO®
- LEGO Digital Designer®
- LDraw ™
- LDraw + LeoCAD
- LDraw + MLCad
CAD to POV-Ray
->LeoCAD to POV-Ray
- Axes + Scales
- Adapted Colors
- LGeo POV-Ray Objects
- LEGO® Model Sizes + Grid
|
Converting Virtual LEGO® models
from LeoCAD to POV-Ray scenes. |
- Be sure to have properly installed
the LGEO POV Library
at C:\LDraw\Apps\LGEO\lg
- Install Library Path for POV-Ray
Use POV-Ray Editor:
Tools -> Edit master POVRAY.INI
and add somewhere at the end of this file:
Library_Path="C:\LDraw\Apps\LGEO\lg"
- Load your LEGO model in LeoGEO.
(file extensions: .lcd, .ldr, .mdl or .dat)
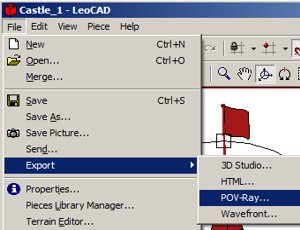
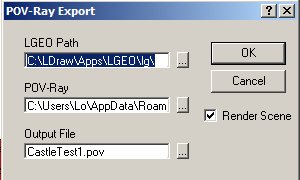
- In LeoGEO: File Export -> POV-Ray
settings there in details:
(seek with in directories with botton "...")
4.1. LGEO POV Library Path
C:\LDraw\Apps\LGEO\lg\
4.2. POV-Ray Programm Path
For POV-Ray 3.7 normally:
C:\Users\Lo\AppData\Roaming\POV-Ray\v3.7\bin\pvengine-sse2.exe
For POV-Ray 3.6 normally:
C:\POV-Ray\bin\pvengine-sse2.exe
(Under Vista also POV-Ray 3.6 should not be installed in C:\Program Files
because there are problems with animations).
4.3. Name + Path of POV-Ray scene file:
Here i.e.: "CastleTest1.pov"
|
POV-Ray export from LeoCAD.
|
Now click the OK botton and POV-Ray should start and render the scene file.
If you look in your POV-Ray scene file directory you will finde there two new files:
"CastleTest1.pov" and "CastleTest1.inc"
After running POV-Ray from LeoCAD
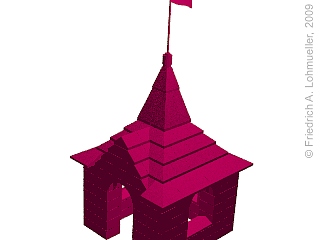
you nomally will get something bad
like the image at the right:
But don't worry - how to hype up such scene files
is the topic of the next chapters of this tutorial.
|
First trial - needs some lifting!
|
|
|


