Home
- POV-Ray Tutorial
- POV-Ray Examples
Index of Content
- Geometry
- Architecture
- Engineering
- Ladder
- Pylons
- Railing
- Bridge
- Tubes
- Tube Fork
- Tube Stopcock
- Chain
- Coil of Wire
- Torpedo
- Cruise Missile
- Rocket
- Wheel
- Truck
- Propeller
- Airplanes
- Canoe
- Guitar Body
- 7-Segment Display
- Ribbon Cable
- Cable Harness
|
|
How To Make a Railing
Objects: cylinder, sphere.
Methods: #local, #declare, union, #macro, #while loops.
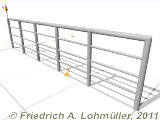
This example shows how to make a railing i.e. for bridges declared as a macro.
The vertical supports are distributed in an equidistant way.
It is possible to use variable sizes for the dimensions of the railing.
|
|
|
The Construction in details:
Step 1: First we declare a macro with the basic variables for the dimensions of the railing
and its default texture (To change this texture, declare it before including the macro!).
#macro Railing_1( R_Len,// railing length in x
                  R_H,  // railing height in y
                  R_D,  // verticals ~distance
                  R_R,  // railing main radius
                  VSD,  // vertical subdivision
                )//-----------------------------
// default texture -----------------------------
#ifndef( Railing_Texture_1 )
#declare Railing_Texture_1 =
  texture { pigment{ color rgb<1,1,1>*0.7}
            normal { bumps 0.25 scale 0.35}
            finish { phong 0.3 }
          } // end of texture
#end // ----------------------------------------
// horizontal subdivision ----------------------
#local NumV = int ( R_Len / R_D);
#local VerticalsDistance = R_Len / NumV;
// equidistant!
//----------------------------------------------
//----------------------------------------------
union{
 // horizontals
 cylinder{ <0,0,0>,<R_Len,0,0>,R_R
           translate<0,R_H    ,0>}
 sphere{<0,0,0>,R_R translate<    0,R_H,0>}
 sphere{<0,0,0>,R_R translate<R_Len,R_H,0>}
 // vertical subdivision
 #if (VSD > 0)
  #local Nr = 0; // start loop
  #while (Nr < VSD )
   cylinder{ <0,0,0>,<R_Len,0,0>, R_R*1/2
             translate<0,Nr*R_H/(VSD),0>}
  #local Nr = Nr + 1;
  #end // end of loop


 #end

 // verticals
 #local Nr = 0;
 #while (Nr <= NumV)
  cylinder{ <0,0,0>,<0,R_H,0>, R_R
          translate<Nr*VerticalsDistance,0,0>}
 #local Nr = Nr +1 ;
 #end // end of loop
 texture{ Railing_Texture_1 }
} // end of union
// ---------------------------------------------
#end // ------------------------ // end of macro
|
Step 2: Now we move this railing definition in an include file,
than we can use this macro from any scene file as a
new ready-made object.
This file should be saved either in the same directory like the POV-Ray scene file, in the POV-Ray include file directory
or in any include file directory with is mentioned as a Library_Path in the povray.ini file like:
Library_Path="C:\Users\MyFiles\MyPovrayFiles\My_include_files"
// POV-Ray 3.7/3.6 include file "Railing_1.inc"
// author: Friedrich A, Lohmueller, Jan-2011
// homepage: www.f-lohmueller.de/
//----------------------------------------------
#ifndef( Railing_1_Inc_Temp)
#declare Railing_1_Inc_Temp = version;
#version 3.7; // 3.6;
//--------------------------///////////////////
// macro 'Railing_1'
 //ADD HERE THE MACRO FROM ABOVE !

// end of macro 'Railing_1'
//--------------------------///////////////////
/* sample:
 //ADD HERE A SAMPLE LIKE THE ONE BELOW !
*/ end sample
//----------------------------------------------
#version Railing_1_Inc_Temp;
#end
//------------------------- end of include file
|
|
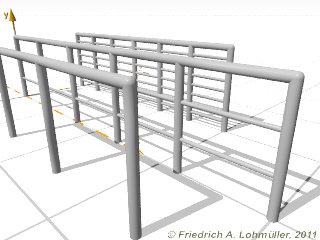
The railing with variable subdivisions.
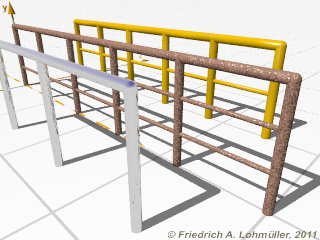
The railing with redeclared textures.
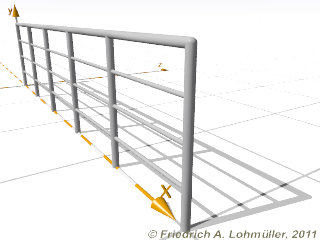
The macro 'Railing_1'
from the include file 'Railing_1.inc'.
Include file for POV-Ray:
"Railing_1.inc"
and scene file for POV-Ray:
"railing_1_1.pov"
|
Step 3: Then we call the macro as an object with the according dimensions:
//------------------- optional texture -----------------------------------//
/*
#declare Railing_Texture_1 =
  texture { pigment{ color rgb<1,1,1>*0.7}
            normal { bumps 0.25 scale 0.35}
            finish { phong 0.3 }
          } // end of texture
*/
//------------------------------------------------------------------------//
#include "Railing_1.inc"
//------------------------------------------------------------------------//
object{ Railing_1( 4.00,  // railing length in x // i.e. 5.00,
                   0.90,  // railing height in y // i.e. 1.00,
                   0.80,  // railing vertical ~distance // i.e. 1.00,
                   0.025, // railing main radius   // i.e. 0.025,
                   4, // vertical subdivision  // integer, i.e. 0, 1, 2, ...
                 ) //-----------------------------------------------------//
        scale <1,1,1>*1
        rotate<0,0,0>
        translate<0.00,0.00, 0.00>
      } // end of object 'Railing_1'
//------------------------------------------------------------------------//
|
|
Download of all ready-made POV-Ray objects
zipped up (with all include files, example files and with
the according Insert Menu Add-ons for comfortable use!)
at the POV-Ray Objects
|


