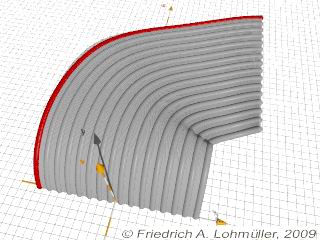
|
How to Make a Ribbon Cable:
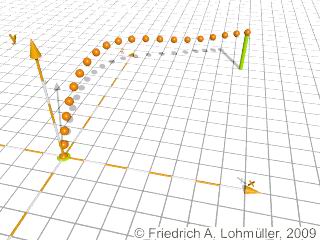
Step 1: A spline curve for the way of the cable.
We create a spline for the way of the ribbon cable.
For testing we let this way draw by a relatively low number of spheres.
It's optimal if the spheres are placed in an nearly equidistant way!
Important:
We have to avoid the spline to be
vertical in any parts of its way!
We also need to avoid any kind of overlapping and too sharp curves.
#declare Wire_R = 0.4;// radius
// spline:
#declare Ribbon_Spline =
spline { natural_spline
   -0.25, < 0.0,-5.0,-1.0>,
    0.00, < 0.0, 0.0, 0.0>, //start
    0.25, < 0.0, 5.0, 4.0>,
    0.50, < 1.5, 6.0,12.0>,
    0.75, < 8.0, 4.0,18.5>,
    1.00, <15.0, 5.0,20.0>, // end
    1.25, <20.0, 5.0,19.4>
} //-------------------------------
union{
 #local Nr = 0;     // start
 #local EndNr = 1;  // end
 #while (Nr <= EndNr)
 sphere{ <0,0,0>, Wire_R
    pigment{ color rgb<1,0.3,0>}
    translate  Ribbon_Spline(Nr)
 } // end of sphere
 #local Nr = Nr + 0.05;
 #end // -------- end of loop
} // ------------------------------ |
A spline curve for the ribbon cable.
|
Step 2: Declaring the cross-section of the cable
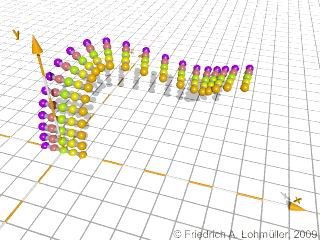
Now we declare a row of spheres in direction x as a cross-section of the ribbon.
We add a sphere for each way we want the ribbon cabel to have.
Then:
#declare Wire_R = 0.30;// radius
#declare Num = 10; // number of ways
#declare Dist = 1.27/2;//
// distance of ways = 0.025inch
#declare Ribbon_Silhuette =
union{ // cross-section in x
  sphere{ <0*Dist,0,0>,Wire_R
          texture{ ... as you want ...}}
  ...
  sphere{ <Num*Dist,0,0>,Wire_R
          texture{ ... as you want ...}}
} // end union
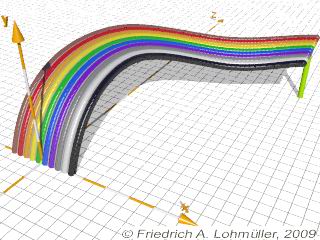
Step 3: Using the Spline_Trans macro
Macro by Rune S. Johansen
(This macro normally is used to put airplanes on their
course. Example see Animations with Spline Curves.)
Instead of the single sphere used in Step_1
we use the object{ Ribbon_Silhuette ..}
and put it on the spline curve using the
Spline_Trans macro.
We also increase the density of
the single elements to get continuouse cables:
// for Spline_Trans:
#include "transforms.inc"
//----------------------------------
union{
 #local Nr = 0;    // start
 #local EndNr = 1; // end
 #while (Nr <=  EndNr)
 object{
    Ribbon_Silhuette
    Spline_Trans(
       Ribbon_Spline,//SplineName,
       Nr,           //TimeValue,
       y,            //Upwards,
       0.05,         //ForeSight,
       0.7           //Banking
      )// end Spline_Trans
    }
 #local Nr = Nr + 0.001;  // next Nr
 #end // --------------- end of loop
} // end of union
//----------------------------------
Note: The starting point and the end point as well as the
directions in these points are defined by the spline values and
by the value "Upwards". Also the values of
"ForeSight" and "Banking" have big influence.
|
ribbon cable
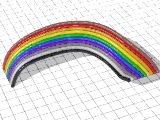
Rainbow ribbon cable also called "hippie cable"
Grey ribbon cable - pin 1 red
|
